The Palmsaver
432 Taunton Pl.
Buffalo, NY 14216
ph: 716-390-6989
info
Installation Instructions
There must be approximately 50% or more of the original palm left on your gloves for The Palmsaver to work properly. The Palmsaver works by adhering to what is left of the original palm. The secret is the adhesive which is super sticky and unaffected by sweat, heat, cold, water and friction. Gloves must be completely dry before installing the repair!
Please e-mail any questions regarding installation to: questions@thepalmsaver.com or call 716-390-6989.
Directions for installation:
Anyone with ordinary skill can install The Palmsaver in 15 minutes or less per glove.
Gloves must be completely dry before installing repair!
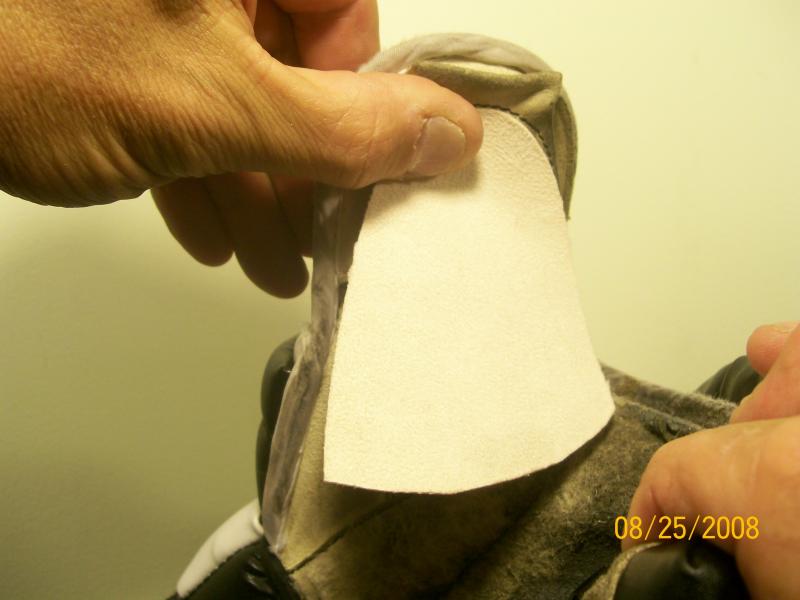
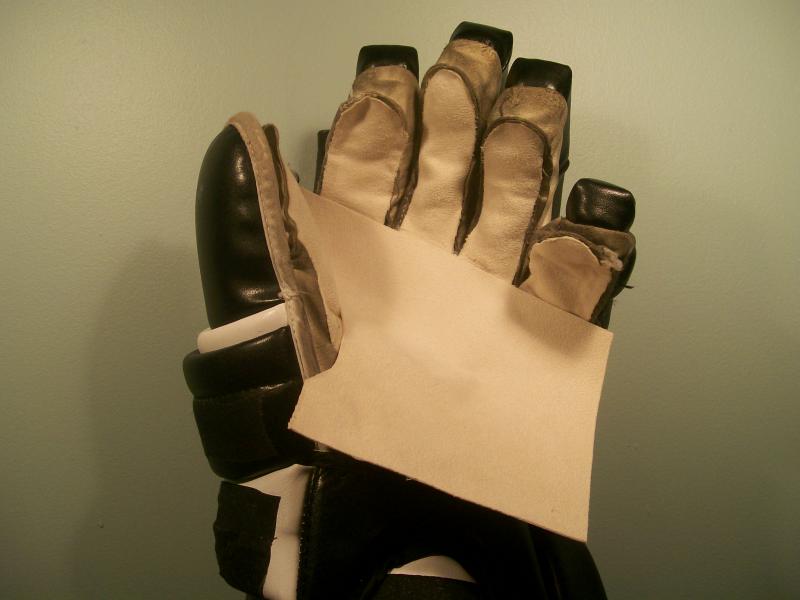
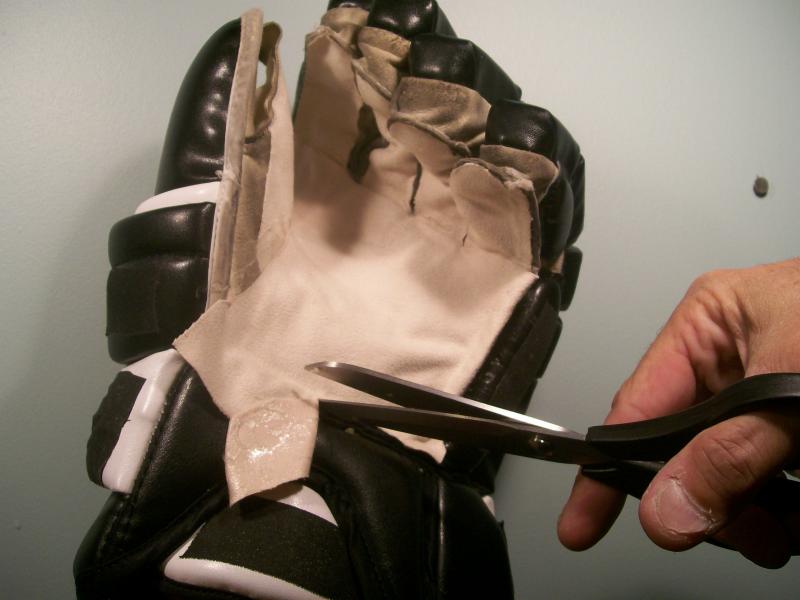
Cut off and remove any loose material on the original palm. Remove desired repair piece from the kit. With your hand inside the glove, “dry fit” (with release liner in place) the section you need on the area that needs repair. Cut to proper size if required with sharp scissors to allow the patch to properly fit the repair area. Apply fingers / thumb first to allow the palm section to overlap them. Peel off the release liner. Take care not to touch the exposed adhesive as much as possible. With hand inside glove, CAREFULLY apply the desired section. Finger sections must be applied starting from the top (rounded) portion first, working down towards the palm area (see fig.1). Thumb section must be applied in the same way as fingers (see fig. 2). Palm section must be applied with the long top edge first in line where each finger forms a “V” and intersects the palm. The remaining three sides should overhang the left, right and bottom edges of the palm area being repaired (see fig. 3). Once they are in place, they are difficult to remove and cannot be reused. IMPORTANT: Press all newly installed sections firmly in place for several minutes making sure to secure all surfaces and edges. Remove hand from glove. Fold the left and right edges over the edges of the original palm. Trim off any excess material with sharp scissors (see fig. 4). TAKE EXTREME CAUTION NOT TO CUT THROUGH GLOVE MATERIAL UNDERNEATH. Sprinkle some talcum (baby) powder inside the glove after the repair is complete to prevent any exposed adhesive from sticking to your hand when wearing glove.
Congratulations! You now have a durable, long lasting palm repair that is almost as good as new. If the repair area begins to wear out, it can be removed and replaced with another Palm Saver. Simply heat up the Palm Saver with a hair dryer set on high heat for two minutes or more, peel off and replace.
Installation photos shown using light creme color material for clarity. The Palmsaver is currently only available in black. Other colors may be added in the future.
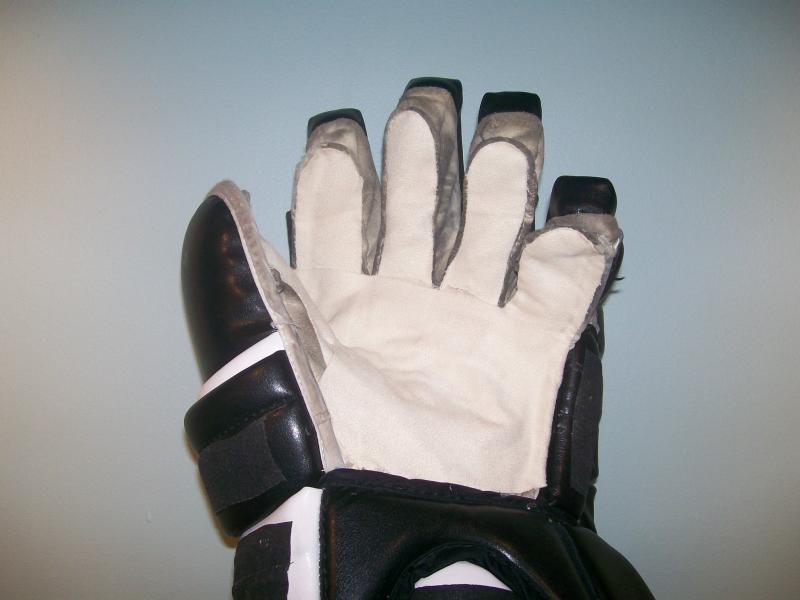
Fig. 5 Finished Palm
Click on images to enlarge
 Fig.2 Installing Thumb Section
Fig. 3 Installing Palm Section Fig. 4 Trimming Excess
HTML clipboardThe Plamsaver is created using a proprietary process. All rights reserved.
The Palmsaver
432 Taunton Pl.
Buffalo, NY 14216
ph: 716-390-6989
info
